Table of Contents
Introduction
Keeping your dog healthy and happy starts with good grooming practices, and one of the most overlooked aspects is ear care. Learning how to clean dog ears at home is an essential skill for any pet owner. Regular ear cleaning not only helps maintain hygiene but also prevents painful infections that can affect your furry friend’s overall health. With the right approach, tools, and a bit of patience, you can ensure your dog’s ears stay clean and free from potential problems. This guide will walk you through the steps and tips to clean dog ears safely and effectively, so you can confidently take care of your pet.
Why Cleaning Your Dog’s Ears is Crucial
Clean dog ears are not just about appearance; they are a cornerstone of your pet’s overall well-being. Dogs are naturally prone to ear issues due to the structure of their ear canals, which can trap moisture, dirt, and debris. This is especially true for breeds with floppy clean dog ears, like Cocker Spaniels or Basset Hounds, or dogs that enjoy frequent swimming sessions.
Ear infections, known as otitis externa, are a common problem among dogs. Symptoms to watch for include excessive scratching, redness, foul odor, or visible wax buildup. These are clear indicators that your dog’s ears need attention. By keeping their ears clean, you can significantly reduce the risk of infection, discomfort, and expensive trips to the vet.
Studies in veterinary medicine emphasize that regular cleaning helps prevent bacterial and yeast overgrowth in the ear canal. Dogs with consistently clean dog
ears are less likely to experience chronic ear issues, making ear hygiene a vital part of their care routine. Whether your dog has long floppy ears, short upright ears, or something in between, ensuring clean dog ears is an essential responsibility for every pet owner.
Supplies You’ll Need to Clean Dog Ears
Before starting the ear-cleaning process, it’s important to gather all the necessary supplies to ensure a smooth and safe experience for both you and your dog. Having the right tools on hand will make the process more efficient and minimize stress for your pet.
Here’s what you’ll need:
- Veterinarian-Approved Ear Cleaning Solution
Choose a solution specifically formulated for dogs. Human ear cleaners or homemade remedies can disrupt the delicate balance of your dog’s ear canal and cause irritation. Look for products with soothing ingredients like aloe vera or antiseptic properties like chlorhexidine. - Cotton Balls or Gauze Pads
These are ideal for gently wiping away debris from the ear canal and flap. Avoid using cotton swabs (like Q-tips), as they can push dirt further into the ear or even damage the eardrum. - Treats for Positive Reinforcement
Cleaning your dog’s ears can be an unfamiliar and uncomfortable experience for them. Offering treats before, during, and after the process helps create a positive association, making future cleanings easier. - Towels or Cloths
Ear cleaning can get messy, especially when your dog shakes their head. Use towels to protect your furniture or floors and to wipe off any excess solution.
By preparing these supplies in advance, you can focus on the cleaning process and keep your dog as calm and comfortable as possible. The key to successful ear cleaning is creating a stress-free environment with the right tools.
Step-by-Step Guide to Cleaning Your Dog’s Ears
Now that you have your supplies ready, let’s dive into the process of cleaning your dog’s ears. Following these steps will ensure the procedure is safe, effective, and minimally stressful for your dog.
1. Prepare Your Dog
Start by finding a calm and quiet location where your dog feels secure. If your dog is anxious or wiggly, enlist a family member or friend to gently hold them in place. Speak to your dog in a soothing tone to help them relax. Remember, the goal is to make them feel comfortable and safe during the process.
2. Apply the Cleaning Solution
- Gently hold your dog’s ear flap upright to expose the ear canal.
- Carefully fill the ear canal with the cleaning solution. Avoid inserting the nozzle directly into the ear, as this can cause injury. Instead, let the liquid flow naturally into the canal.
- Once the solution is in, massage the base of the ear with your fingers for about 20-30 seconds. This helps loosen wax and debris, making it easier to remove.
3. Wipe Away Debris
Using a cotton ball or gauze pad, gently clean the visible parts of the ear canal and the inner ear flap. Avoid pushing anything too far into the ear, as this can harm your dog. Focus on removing dirt, wax, and any leftover cleaning solution.
4. Let Them Shake
Dogs naturally shake their heads to get rid of excess liquid and debris. Allow your dog to shake after cleaning—it’s a great way for them to help expel anything left inside the ear canal.
5. Reward Your Dog
Once the cleaning is complete, offer your dog plenty of praise and a treat. This reinforces positive behavior and makes the process more enjoyable for them in the future.
Regularly following these steps will help you to clean dog ears and keep it healthy while strengthening your bond with your pet.

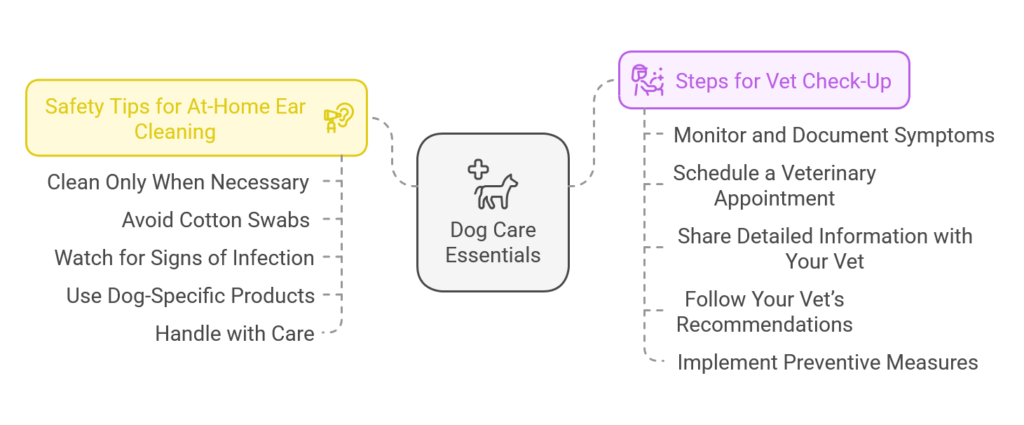
Safety Tips for At-Home Ear Cleaning
The process to clean dog ears is straightforward, but it’s important to follow some key safety tips to avoid causing harm. Dog ears are sensitive, and improper cleaning techniques can lead to irritation or even injury.
1. Clean Only When Necessary
Over-cleaning can disrupt the natural balance of your dog’s ears and lead to irritation. Most dogs only need their ears cleaned once a month, but some breeds or dogs with frequent ear infections may require more frequent cleaning. Consult your veterinarian if you’re unsure how often to clean dog ears.
2. Avoid Cotton Swabs
Never use cotton swabs (Q-tips) to clean dog ears. These can push debris deeper into the ear canal, potentially causing blockages or damage to the eardrum. Stick to cotton balls or gauze pads for a safer cleaning experience.
3. Watch for Signs of Infection
Before cleaning your dog’s ears, check for signs of infection, such as redness, swelling, discharge, or a foul odor. If you notice any of these symptoms, stop the cleaning process and consult your veterinarian immediately. Cleaning an infected ear can worsen the problem or cause pain.
4. Use Dog-Specific Products
Human ear cleaners or DIY solutions can be too harsh for your dog’s ears. Always use products formulated for dogs, as they are designed to maintain the proper pH balance and avoid irritation.
5. Handle with Care
Be gentle throughout the process, especially if your dog seems uncomfortable or anxious. Avoid forcing your dog to sit still, as this can create a negative experience and make future ear cleanings more difficult.
By following these safety tips, you can confidently clean dog ears at home while ensuring your pet’s comfort and health. If in doubt, consult your veterinarian for guidance tailored to your dog’s specific needs.
Selecting the Right Ear Cleaning Solution
Choosing the right ear cleaning solution is a critical part of ensuring the safety and effectiveness of cleaning your dog’s ears. Not all products are created equal, and using the wrong solution can lead to irritation or exacerbate existing issues. Here’s how to pick the best cleaner for your dog’s ears.
What to Look For in an Ear Cleaner
- Veterinarian-Approved Products: Always choose a cleaner recommended or approved by your vet. These are specially formulated to match the unique needs of your dog’s ears, including their pH balance.
- Gentle and Soothing Ingredients: Look for ingredients like:
- Chlorhexidine: A powerful antiseptic that helps prevent bacterial and fungal growth.
- Aloe Vera: Known for its soothing properties, aloe vera reduces irritation and inflammation.
- Saline Solution: A safe and gentle option for flushing debris from the ear canal.
- Alcohol-Free Formulas: Alcohol can dry out and irritate the sensitive skin inside your dog’s ears. Opt for alcohol-free products to avoid unnecessary discomfort.
What to Avoid
- Human Products: Ear cleaners designed for humans may contain harsh chemicals or ingredients that are unsuitable for dogs.
- Homemade Remedies: While DIY solutions may seem cost-effective, they often lack the safety and efficacy of professionally formulated products. Vinegar, for example, can irritate your dog’s ears if not properly diluted.
By selecting a dog-specific ear cleaner with the right ingredients, you can ensure a safe and effective cleaning process every time. When in doubt, consult your veterinarian for product recommendations.
Common Mistakes and How to Avoid Them
Cleaning your dog’s ears may seem simple, but there are common mistakes that can lead to discomfort or even injury. Understanding these pitfalls will help you avoid them and ensure a smooth, stress-free experience for your dog.
1. Cleaning Too Frequently or Infrequently
- Too Often: Over-cleaning can strip the natural oils in your dog’s ears, leading to irritation and an increased risk of infection. Most dogs only need ear cleaning once a month unless otherwise advised by a vet.
- Too Rarely: Neglecting ear cleaning allows debris and wax to build up, creating an environment where bacteria and yeast can thrive. Regular cleaning is key to maintaining healthy ears.
2. Using the Wrong Tools
- Cotton Swabs: As mentioned earlier, these can push debris deeper into the ear canal, potentially causing blockages or damage.
- Sharp Objects: Never use sharp or pointed tools, as they can puncture the ear canal or eardrum. Stick to cotton balls or gauze for safe cleaning.
3. Forcing the Process
If your dog is uncomfortable or resistant, forcing them to sit still can create fear and make future cleanings more difficult. Instead, take the time to calm your dog, use positive reinforcement, and proceed at their pace.
4. Ignoring Signs of Infection
Cleaning an ear that is already infected can worsen the problem. Be vigilant about signs of redness, swelling, foul odors, or excessive discharge. If you notice any of these symptoms, stop cleaning and consult your veterinarian.
5. Using Improper Products
Human ear cleaners or homemade remedies can do more harm than good. Always use veterinarian-approved solutions specifically formulated for dogs.
Avoiding these common mistakes will help you build a positive routine and ensure your dog’s ears stay healthy and clean without unnecessary risks.
Beyond Ear Cleaning: Overall Ear Health Maintenance
Keeping your dog’s ears clean is just one part of maintaining their overall ear health. By incorporating preventative measures and good habits into your routine, you can reduce the need for frequent cleanings and help your dog avoid ear-related issues.
Lifestyle Adjustments for Healthy Ears
- Grooming for Long-Eared Breeds: Dogs with long, floppy ears are more prone to infections due to limited airflow. Regularly trim the hair around their ears to improve ventilation and reduce the risk of debris buildup.
- Drying After Swimming or Bathing: Moisture is a breeding ground for bacteria and yeast. After your dog swims or bathes, gently dry their ears with a soft towel to prevent excess moisture from lingering in the ear canal.
- Routine Ear Checks: Make a habit of inspecting your dog’s ears weekly for redness, swelling, or unusual odors. Early detection of issues can prevent serious infections.

Nutrition and Its Role in Ear Health
What your dog eats can significantly impact their overall health, including their ears. A balanced diet supports their immune system and reduces the likelihood of infections. Here’s what to consider:
- High-Quality Protein Sources: Look for dog foods with named protein sources like chicken or beef, rather than generic “meat meal.”
- Avoid Fillers: Foods with whole ingredients like grains and vegetables are preferable over those with fillers like corn or soy.
- Omega-3 Fatty Acids: These help reduce inflammation and promote healthy skin and ears.
Regular Vet Checkups
Even with proper cleaning and care, regular checkups with your veterinarian are crucial. Your vet can identify underlying issues that may not be visible and provide tailored advice for your dog’s specific needs.
By combining regular ear cleaning with preventative care and proper nutrition, you can ensure that your dog enjoys excellent ear health and a happier, healthier life.
Conclusion
Cleaning your dog’s ears at home doesn’t have to be a daunting task. With the right tools, techniques, and a calm approach, you can make ear cleaning a stress-free part of your dog’s routine. Keeping your dog’s ears clean not only promotes good hygiene but also helps prevent painful infections and costly veterinary visits. Remember, clean dog ears are a reflection of overall health and comfort.
Always pay attention to your dog’s behavior and any signs of discomfort or infection. When in doubt, consult your veterinarian to ensure you’re using the best practices and products for your pet’s unique needs. By staying proactive and consistent with ear care, you can contribute to your dog’s long-term health and happiness.
A clean ear is a happy ear—and a happy ear makes for a wagging tail!
FAQs
1. Can I use hydrogen peroxide to clean my dog’s ears?
No, hydrogen peroxide can irritate the sensitive skin in your dog’s ears and may cause discomfort or even damage over time. It’s best to use a veterinarian-approved ear cleaning solution designed specifically for dogs.
2. How do I know if my dog’s ears are infected?
Signs of an ear infection include redness, swelling, foul odor, discharge, excessive scratching, or your dog shaking their head frequently. If you notice any of these symptoms, consult your veterinarian before attempting to clean the ears.
3. How often should I clean my dog’s ears?
The frequency of ear cleaning depends on your dog’s breed, activity level, and individual needs. For most dogs, cleaning their ears once a month is sufficient. However, dogs prone to ear issues, such as those with floppy ears or those that swim often, may need more frequent cleaning. Your veterinarian can provide specific recommendations.
4. Is it safe to clean a puppy’s ears?
Yes, it is safe to clean a puppy’s ears if done gently and with the right products. Use a mild, dog-specific ear cleaning solution and follow the same steps as you would for an adult dog. Puppies can be more sensitive, so go slowly and offer plenty of treats and reassurance.
5. What if my dog won’t let me clean their ears?
If your dog is anxious or resistant, start by building positive associations with ear cleaning. Let them sniff the cleaning supplies and reward them with treats for calm behavior. You can also break the process into smaller steps over multiple sessions. If the resistance persists, consult a professional groomer or veterinarian for assistance.
6. Can I clean my dog’s ears without a cleaning solution?
While it’s possible to wipe the outer ear flap with a damp cloth, cleaning the ear canal effectively requires a dog-specific ear cleaning solution. These solutions are formulated to break down wax and debris while maintaining the proper pH balance for your dog’s ears.